Gel manicures have become a go-to for many because of their long-lasting shine and durability. While salon visits can be pricey, mastering the art of DIY gel nails at home not only saves money but also offers the convenience of doing it anytime. With the right tools and techniques, you can achieve salon-quality results without leaving your home.
Benefits of Doing Gel Nails at Home:
- Cost-Effective: One salon gel manicure can cost as much as a complete DIY kit.
- Convenience: No appointments are needed- do your nails anytime.
- Customization: Experiment with colors, designs, and styles at your own pace.
Essential Tips for Beginners:
- Always work in thin layers to prevent peeling.
- Invest in a good quality UV/LED lamp for proper curing.
- Practice patience—rushing can lead to smudges and uneven finishes.
Tools & Supplies You’ll Need
Before diving into your gel manicure, gather all the necessary tools. Having everything on hand makes the process smoother and ensures better results.
Gel Nail Kit Essentials:
- UV/LED Lamp: For curing the gel polish.
- Base Coat & Top Coat: These are non-negotiable for longevity.
- Gel Nail Polish: Choose your favorite shades.
- Nail File & Buffer: To shape and smoothen the nail surface.
- Cuticle Pusher & Cuticle Oil: For neat cuticles and post-manicure care.
- Lint-Free Wipes & Rubbing Alcohol: To clean nails and remove any sticky residue.
- Acetone: This is used for easy gel removal when needed.
Choosing the Right UV/LED Lamp:
- Opt for a lamp with at least 36 watts for efficient curing.
- Make sure it has a timer function to avoid over-curing.
Recommended Gel Polishes:
- Look for non-toxic, long-lasting formulas.
- Brands like Beetles, Gelish, and OPI GelColor are great for beginners.
Preparing Your Nails
Proper nail prep is crucial for a long-lasting gel manicure. Skipping or rushing this step often leads to premature chipping or lifting.
Cleaning & Shaping Your Nails:
- Remove old polish with acetone.
- Trim and shape your nails using a nail file.
- Lightly buff the surface to remove shine—this helps the gel adhere better.
How to Push Back Cuticles Safely:
- Soak your fingers in warm water for a few minutes.
- Gently push back cuticles using a cuticle pusher.
- Avoid cutting cuticles as it can lead to infection.
Buffing & Dehydrating the Nail Surface:
- Buffing creates a rougher surface for the gel to grip.
- Use a lint-free wipe soaked in rubbing alcohol to remove dust and oils.
Step-by-Step DIY Gel Manicure
Now that your nails are prepped, it’s time to apply the gel polish. Follow these detailed steps to achieve a smooth, salon-quality finish that lasts.
1. Apply Base Coat
The base coat acts as a foundation, ensuring the gel polish adheres properly and protects your natural nails.
- Apply a thin, even layer of base coat, covering the entire nail surface but avoiding the cuticles and skin to prevent lifting.
- Cap the free edge (the tip of your nail) by lightly brushing the base coat over it—this helps prevent chipping.
- Cure under a UV/LED lamp for 30-60 seconds (follow the time recommended by your lamp or base coat brand) until the layer is completely dry and hardened.
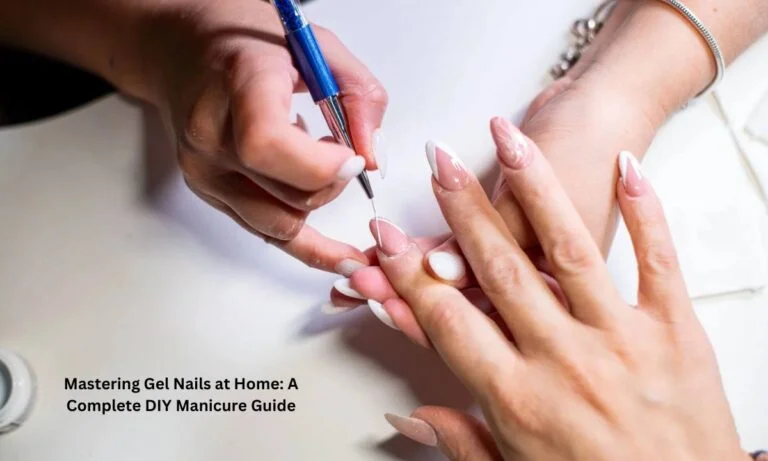
2. Apply Gel Polish
This is where your color comes to life! The key is to apply thin, even coats for a flawless finish.
- Apply a thin layer of your chosen gel polish color. Avoid overloading the brush, as thick layers can cause bubbling or wrinkling.
- Cure under the UV/LED lamp for 30-60 seconds after each coat. Make sure the entire nail is exposed to the light for even curing.
- Repeat the process with 2-3 coats for full opacity, curing each layer before moving to the next. Thinner layers ensure better adhesion and prevent peeling.
3. Seal with Top Coat
The top coat adds shine, seals in the color, and protects your manicure from chips and scratches.
- Apply a thin, even layer of gel top coat, making sure to cover the entire nail and cap the free edge again.
- Cure under the UV/LED lamp for 60 seconds (or follow the top coat instructions) until the nails are fully set and glossy.
4. Remove Sticky Residue
After curing the top coat, a tacky layer may remain—this is normal.
- Dampen a lint-free wipe with rubbing alcohol or a nail cleanser.
- Gently wipe each nail to remove the sticky residue, revealing a smooth, glossy finish.
💡 Pro Tip: Avoid using cotton balls for this step, as they can leave behind lint that sticks to your fresh manicure.
Common Mistakes & How to Avoid Them
- Thick Layers:
- Thick coats can cause bubbling and peeling. Always apply thin, even layers.
- Not Curing Properly:
- Under-curing leads to soft, smudge-prone nails. Stick to the lamp’s recommended curing time.
- Skipping Nail Prep:
- Oily nails prevent proper adhesion. Always clean and buff before applying gel.
- Flooding Cuticles with Polish:
- Avoid applying gel too close to the cuticles to prevent lifting.
By following these steps and avoiding common pitfalls, you can achieve a flawless DIY gel manicure right at home. Happy painting!
How to Remove Gel Nails at Home
Removing gel nails properly is essential to avoid damaging your natural nails. Harsh peeling or scraping can thin out your nails, so always opt for gentle methods.
Soaking Off Method:
- File the Top Coat: Lightly buff the shiny top layer to help acetone penetrate.
- Soak Cotton Balls in Acetone: Place soaked cotton balls on each nail.
- Wrap with Foil: Secure the cotton balls with aluminum foil and leave for 10-15 minutes.
- Gently Remove Gel: Use a cuticle pusher to scrape off softened gel.
- Buff & Hydrate: Buff away residue and apply cuticle oil to restore moisture.
Gentle Nail File Removal:
- If you prefer not using acetone, gently file the gel layers down until you reach the natural nail.
- Be careful not to over-file, as this can damage the nail bed.
Protecting Your Natural Nails After Removal:
- Apply a nail strengthener or keratin treatment.
- Keep nails hydrated with cuticle oil and hand cream.
Nail Care Tips Post-Gel Manicure
After removing gel nails, your natural nails might feel dry or weak. Here’s how to bring them back to health:
- Hydrate Cuticles: Use cuticle oil daily to prevent dryness and promote nail growth.
- Use Strengthening Treatments: Opt for nail hardeners or protein-infused treatments.
- Avoid Immediate Reapplication: Give your nails a break before your next gel manicure.
- Moisturize Regularly: Keep your hands and nails moisturized to maintain flexibility and strength.
Creative Gel Nail Designs for Beginners
You don’t need to be a pro to create eye-catching nail art. Try these simple designs to step up your DIY game:
- Classic French Tips: Timeless and easy with a sheer base and white tips.
- Glitter Fade: Apply glitter polish from the tips down for a subtle ombré effect.
- Accent Nail: Paint one nail a different color or add decals for extra flair.
- Minimalist Lines: Use a thin nail brush or tape to create clean lines and geometric shapes.
- Seasonal Themes: Try snowflakes for winter, florals for spring, or neon hues for summer.
Conclusion
Mastering a DIY gel manicure at home is all about patience and practice. With the right tools, proper prep, and a little creativity, you can achieve salon-worthy nails anytime you want. Follow this guide, and you’ll soon be flaunting flawless gel nails without the hefty price tag! 💅✨
FAQs: DIY Gel Manicure
How long do gel nails last at home?
DIY gel manicures typically last 2-3 weeks if applied and cured correctly.
Can I use regular nail polish with a gel top coat?
No, regular polish doesn’t adhere the same way and may peel under a gel top coat. Use gel polishes for the best results.
Why is my gel manicure peeling after a few days?
Peeling often happens if nails weren’t properly prepped or if layers were applied too thick. Always buff and clean nails before applying gel.
How often should I give my nails a break from gel polish?
It’s recommended to take a 1-2 week break every few months to allow natural nails to recover.
Do I need a UV or LED lamp to cure gel nails at home?
Yes, curing gel polish under a UV or LED lamp is essential for hardening the layers and ensuring long-lasting wear. While both work, LED lamps cure faster and are less harsh on the skin compared to traditional UV lamps. Always follow the curing time recommended by your gel polish brand.
Thanks For Visiting Our Blog
For more insight Keep Visiting Valley News Magazine
Explore Our More Blogs
The Best Way to Get the Milky Nail Appearance at Home
How to Use Gel Extensions with Semi-Cure Gel Nail Strips: A Step-by-Step Guide