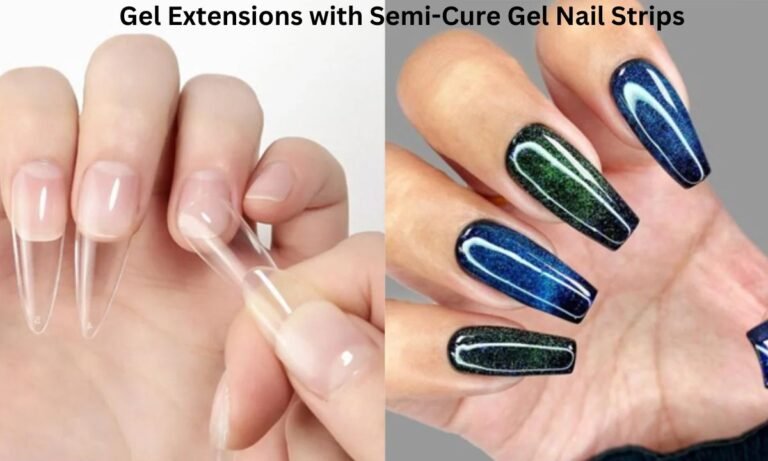
Gel extensions are a fantastic way to add length and strength to your natural nails, while semi-cure gel nail strips offer salon-quality nail art with ease. Combining both gives you long-lasting, beautiful nails with added durability and creative designs. In this guide, we’ll walk you through how to use gel extensions with semi-cure gel nail strips, step-by-step.
What Are Gel Extensions and Semi-Cure Gel Nail Strips?
Gel Extensions
Gel extensions are a popular nail enhancement method that uses either soft or hard gel to extend the length of your natural nails. They offer a lightweight yet durable finish, making them an excellent choice for anyone looking to add length, strength, and versatility to their nails. Unlike acrylics, gel extensions are more flexible and less likely to cause damage when applied and removed correctly.
There are various types of gel extensions:
- Soft Gel Extensions: More flexible and lightweight, often used with pre-made gel tips.
- Hard Gel Extensions: Stronger and more durable, suitable for sculpting nails using forms.
- Builder Gel: A thick gel used to create custom shapes and add extra strength.
Gel extensions are cured under a UV or LED lamp, which hardens the gel, giving you a glossy and chip-resistant finish. They can last up to 3-4 weeks with proper care and are perfect for creating customized nail shapes like almond, coffin, or square.
Semi-Cure Gel Nail Strips
Semi-cure gel nail strips are pre-made gel strips that are about 60% cured, making them flexible and easy to apply while still requiring final curing under a UV/LED lamp for a long-lasting finish. They offer a perfect middle ground between traditional nail wraps and salon gel polish, providing the strength of gel with the convenience of a sticker.
Why Semi-Cure Gel Strips Stand Out:
- Flexibility During Application: Since they’re not fully cured, they can be stretched slightly to fit your nail shape perfectly.
- Minimal Drying Time: Once applied and cured under a UV/LED lamp for 60-90 seconds, they harden just like salon gel polish.
- Variety of Designs: Available in a wide range of colors, patterns, and effects—no artistic skills needed.
- No Smudging or Mess: Unlike liquid gels or nail polish, there’s no risk of smudges or spills.
They’re perfect for at-home users who want a professional-looking manicure without the hassle of using gel pots or brushes. When used with gel extensions, they offer longer-lasting results and the freedom to try creative designs on longer nails.
Tools You’ll Need
- Gel extension tips (or builder gel)
- Semi-cure gel nail strips
- Nail file & buffer
- Cuticle pusher
- Nail glue or builder gel (for extensions)
- Base coat
- Top coat
- UV/LED lamp
- Scissors (optional, for trimming nail strips)
- Alcohol wipes or nail cleanser
Step-by-Step Guide to Using Gel Extensions with Semi-Cure Gel Nail Strips
Step 1: Prepare Your Natural Nails
Before starting the application process, it’s essential to properly prepare your natural nails to ensure long-lasting results. Begin by washing your hands and thoroughly cleaning your nails with soap and water to remove any dirt or oils. Dry your hands completely, as moisture can affect the adhesion of both gel extensions and nail strips. Next, use a cuticle pusher to gently push back your cuticles. This step not only creates a clean nail bed but also helps the extensions and gel strips sit smoothly without lifting.
Once the cuticles are pushed back, use a nail file to lightly shape the free edge of your natural nails. Then, gently buff the surface of each nail to remove any shine. This creates a slightly rough texture, allowing the gel products to adhere better. Finally, wipe each nail with an alcohol wipe or nail cleanser to remove dust, oils, and any residue from filing. This ensures a clean surface, which is crucial for a strong and lasting bond.
Step 2: Apply Gel Extensions
Now that your natural nails are prepped, it’s time to apply the gel extensions. Start by selecting gel extension tips that match the width of each of your natural nails. It’s important that the tips fit sidewall to sidewall without overlapping, as an improper fit can cause lifting or breakage. Once you have the right sizes, apply nail glue or a thin layer of builder gel to the underside of the gel tip.
Hold the extension at a 45-degree angle and gently press it onto your natural nail. This angle helps push out any trapped air, reducing the chances of bubbles that can weaken the bond. Once the tip is in place, cure it under a UV/LED lamp for 60-90 seconds to fully harden the gel and secure the extension. After curing, use a nail file to shape the extensions to your desired length and style whether you prefer almond, square, or coffin shapes. Lastly, lightly buff the surface of the extensions to remove shine, which will help the semi-cure gel nail strips adhere more effectively.
Step 3: Apply Semi-Cure Gel Nail Strips
With the gel extensions securely in place, it’s time to apply the semi-cure gel nail strips. Begin by selecting the right size strip for each nail. The strip should be slightly smaller than the width of your nail bed to prevent lifting along the edges. Once you’ve chosen the right size, gently peel the strip from its backing. Align it near the cuticle area, placing it just a hairline away from the skin, and press it down toward the tip.
As you apply the strip, use your fingers or a silicone tool to smooth it out, starting from the center and moving outward. This helps remove any air bubbles and ensures an even application. If the strip extends beyond the free edge of your nail, trim the excess using scissors or a nail file. Once the strip is perfectly in place, cure your nails under a UV/LED lamp for 60 seconds. This finalizes the curing process and hardens the strip, giving it a glossy, salon-like finish.
Step 4: Seal and Finish
To ensure your manicure lasts as long as possible, sealing everything in with a top coat is essential. Before applying the top coat, you can add a base coat for extra adhesion, though this step is optional. Once ready, apply a thin but even layer of top coat over the entire nail, making sure to seal the free edges. This step not only adds extra shine but also protects the gel strips and extensions from chipping and peeling.
After applying the top coat, cure your nails under the UV/LED lamp for another 60 seconds. This hardens the top coat and locks in your design. Finally, cleanse your nails with an alcohol wipe to remove any tacky residue left from the curing process. The result? Beautiful, glossy, and durable nails that look like they were done at a professional salon.
Tips for Long-Lasting Results
- Always push back cuticles to prevent lifting.
- Avoid air bubbles during gel extension application.
- Cap the free edge with the top coat to prevent peeling.
- Use gloves when doing household chores to protect your nails.
Conclusion
Using gel extensions with semi-cure gel nail strips offers a durable, salon-quality manicure from the comfort of your home. With endless design possibilities and long-lasting results, following this step-by-step guide ensures flawless, beautiful nails that can last for weeks.
Follow this guide for stunning nails that last weeks!
FAQs
How long do gel extensions with semi-cure gel strips last?
With proper application and care, gel extensions combined with semi-cure gel strips can last up to 3 weeks. Ensuring your nails are properly prepped, sealing the edges with a top coat, and avoiding excessive water exposure can help extend their durability.
Can I use regular gel polish over semi-cure gel strips?
Yes, you can apply regular gel polish over semi-cure gel strips if you want to add extra color or design. However, it may affect the original finish and shine. To maintain the best results, it’s recommended to use a gel top coat to seal the design and add long-lasting gloss.
How do I remove them?
To safely remove gel extensions and semi-cure gel strips, soak your nails in acetone for about 15 minutes or use nail clips for more targeted and efficient removal. Once the gel softens, gently push it off with a cuticle pusher. Avoid forcing or peeling, as this can damage your natural nails.
Can I fill in gel extensions after the nails grow out?
Yes, you can fill in gel extensions instead of removing them entirely. As your natural nails grow, a gap will appear near the cuticle. Apply a thin layer of builder gel in the grown-out area, then cure under a UV/LED lamp. Buff the surface smooth, reapply the top coat, and cure again for a fresh, seamless finish.How do I prevent lifting or peeling of the semi-cure gel strips?
To avoid lifting or peeling, make sure your nails are completely clean, dry, and free of oils before application. Properly buffing and cleansing the nail surface helps the strips adhere better. Also, ensure you press out any air bubbles during application and seal the edges with a top coat to prevent water or debris from getting underneath.
Thanks For Visiting Our Blog
For more insight Keep Visiting Valley News Magazine
Explore Our More Blogs
How to Make Press-On Nails Last Longer?
How to Get Nail Glue Off Your Nails: A Complete Guide
Good for Health, Bad for Education: Exploring the Modern Lifestyle Dilemma