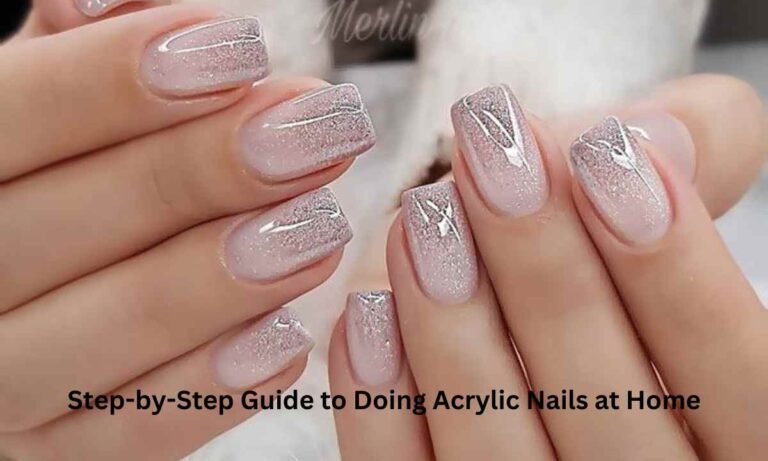
Acrylic nails are a popular choice for those who love long, stylish, and durable nails. They provide a professional salon look and allow for endless creativity with nail shapes, designs, and colors. While many people go to nail salons for acrylics, you can easily achieve salon-quality nails at home with the right tools and techniques.
Acrylic nails are artificial nail enhancements created by combining acrylic powder with a liquid monomer. This mixture forms a thick paste that hardens when exposed to air, creating a strong and durable nail extension. Acrylic nails can be applied over natural nails or nail tips to add length and strength. They are widely used for their durability and ability to hold intricate designs.
Benefits of Doing Acrylic Nails at Home
- Cost-Effective – Regular salon visits can be expensive, but doing acrylic nails at home can save you money in the long run.
- Convenience – No need to book an appointment; you can do your nails at any time that suits you.
- Creative Freedom – You can experiment with different nail shapes, lengths, and designs without relying on a nail technician.
- Learning a New Skill – Mastering acrylic nails allows you to improve your technique and possibly turn it into a business.
Essential Tools and Materials
Before starting the acrylic nail application, gathering all the necessary tools and products is crucial.
Acrylic Nail Kit Essentials
To create beautiful acrylic nails at home, you’ll need:
- Acrylic powder (clear, pink, or colored)
- Acrylic liquid (monomer)
- Acrylic nail brush
- Dappen dish (for holding liquid monomer)
- Nail tips (optional, for added length)
- Nail glue (for attaching tips)
- Cuticle pusher
- Nail file and buffer
- Lint-free wipes
- Base coat and top coat
- Nail dehydrator and primer
- Nail polish or gel polish (optional)
Choosing the Right Acrylic Powder and Liquid
- Acrylic Powder – Comes in different colors and strengths. Beginners should start with clear or natural pink powders.
- Acrylic Liquid (Monomer) – Should be high-quality and low-odor to ensure smooth application. Avoid cheap monomers that can cause strong fumes or slow drying.
Nail File, Buffer, and Other Accessories
- Nail File – Essential for shaping acrylic nails and blending nail tips. A 180-grit file is ideal for shaping.
- Buffer – Helps smooth the surface before applying polish.
- Cuticle Pusher – Removes excess cuticle for better acrylic adhesion.
Preparing Your Natural Nails
Prepping your natural nails is a crucial step to ensure acrylic nails last longer and do not lift prematurely.
Cleaning and Trimming Your Nails
- Wash your hands thoroughly to remove any dirt or oil.
- Trim your natural nails short to create a solid base.
Pushing Back and Prepping Cuticles
- Use a cuticle pusher to gently push back the cuticles.
- Avoid cutting too much cuticle, as this can lead to infections.
Buffing and Dehydrating the Nail Surface
- Lightly buff the nail surface using a fine-grit buffer.
- Apply a nail dehydrator to remove excess moisture and oil.
- Use nail primer to enhance adhesion and prevent lifting.
Applying Nail Tips (Optional)
If you want to extend the length of your nails, you can use nail tips before applying acrylic.
Choosing the Right Nail Tip Size
- Select nail tips that closely match the width of your natural nails.
- If a tip is too wide, file it down slightly to fit perfectly.
- Avoid using too-large tips, as they can cause lifting.
Properly Gluing and Shaping Nail Tips
- Apply a small amount of nail glue to the back of the tip.
- Gently press the tip onto the nail, ensuring there are no air bubbles.
- Hold it in place for 10–15 seconds until secure.
- Trim and shape the nail tips to your desired length and style (square, oval, coffin, etc.).
Mixing and Applying Acrylic
Applying acrylic correctly is key to achieving smooth and long-lasting nails.
Understanding Acrylic Powder-to-Liquid Ratio
- The correct powder-to-liquid ratio prevents the acrylic from being too runny or too dry.
- Dip your acrylic brush into the monomer, then gently press it into the acrylic powder to form a bead.
- A good bead should be moist but not dripping.
Using the Acrylic Brush Correctly
- Use a high-quality acrylic brush to pick up and apply the acrylic mixture smoothly.
- Avoid pressing too hard; instead, let the brush guide the acrylic over the nail.
Building the Acrylic Layer Smoothly
- Start near the cuticle and move toward the tip, applying thin, even layers.
- Use a patting motion rather than dragging the brush.
- Blend the acrylic into the natural nail to avoid harsh lines.
- Allow the acrylic to set before moving to the next step.
Shaping and Filing Acrylic Nails
Once the acrylic has dried, shaping and refining the nails will give them a professional finish.
Achieving the Desired Nail Shape
- Use a 100–180 grit nail file to shape the edges of the acrylic nails.
- File in one direction to prevent weakening the acrylic.
- Popular shapes include square, almond, coffin, and stiletto.
Smoothing the Surface with a Buffer
- Buff the entire nail surface to remove any bumps or rough areas.
- A smooth surface ensures a flawless polish application.
Polishing and Designing Your Acrylic Nails
Now that your nails are shaped and smooth, it’s time to add color and designs.
Applying a Base Coat and Nail Polish
- Apply a thin base coat to protect the acrylic and enhance adhesion.
- Let it dry before applying nail polish or gel polish.
Adding Nail Art and Decorations
- Use nail stickers, rhinestones, or glitter for creative designs.
- Try marble, ombré, or chrome effects for a stylish look.
Sealing with a Top Coat for Long-Lasting Finish
- Apply a glossy or matte top coat to seal the color.
- Cure under a UV/LED lamp if using gel polish.
Drying and Curing Process
Air Drying vs. Using a UV/LED Lamp
- Regular nail polish air dries naturally within minutes.
- Gel polish requires a UV or LED lamp to cure properly.
Acrylic Nail Maintenance and Care
How to Prevent Lifting and Cracking
- Avoid getting water under the acrylics.
- Apply cuticle oil daily to keep nails hydrated.
- Be gentle with your nails to prevent breakage.
Tips for Long-Lasting Acrylic Nails
- Refill the acrylic every 2–3 weeks to maintain durability.
- Avoid using nails as tools to prevent lifting.
Removing Acrylic Nails Safely
Soaking Off with Acetone
- Buff the top layer of the acrylic nails.
- Soak nails in 100% pure acetone for 15–20 minutes.
- Use a cuticle pusher to gently remove softened acrylic.
Avoiding Damage to Natural Nails
- Never pry off acrylic nails, as this can cause nail damage.
- Moisturize your nails after removal to restore strength.
Common Mistakes to Avoid
Overuse of Acrylic Liquid
- Using too much liquid can make the acrylic runny and hard to control.
Applying Too Thick or Too Thin Layers
- Thick acrylic can look bulky and take longer to dry.
- Thin layers may crack easily.
Not Prepping Nails Properly
- Skipping nail dehydration and primer can lead to lifting.
- Buffing too much can weaken natural nails.
Conclusion
Final Tips for Perfect Acrylic Nails at Home
- Always use high-quality products for the best results.
- Take your time and practice for a smoother application.
- Keep your tools clean to maintain hygiene.
Encouragement to Practice and Improve
Doing acrylic nails at home can be a fun and rewarding experience. With regular practice, you can achieve salon-quality nails while saving money. Experiment with different styles and enjoy your beautifully designed nails!
Thanks For Visiting Our Blog
For more insight Keep Visiting Valley News Magazine
Explore Our More Blogs
Mastering Gel Nails at Home: A Complete DIY Manicure Guide
The Best Way to Get the Milky Nail Appearance at Home
How to Use Gel Extensions with Semi-Cure Gel Nail Strips: A Step-by-Step Guide